

Anyone working with robots has likely touched ROS and potentially used a ROS enabled robot. At Viam, we're excited about helping companies build better and brighter robots—faster and more flexibly.
In this blog post, we'll share how Viam and ROS can play together in various ways to help you do that, as well as how you can try it out yourself.
We'll cover these three areas:
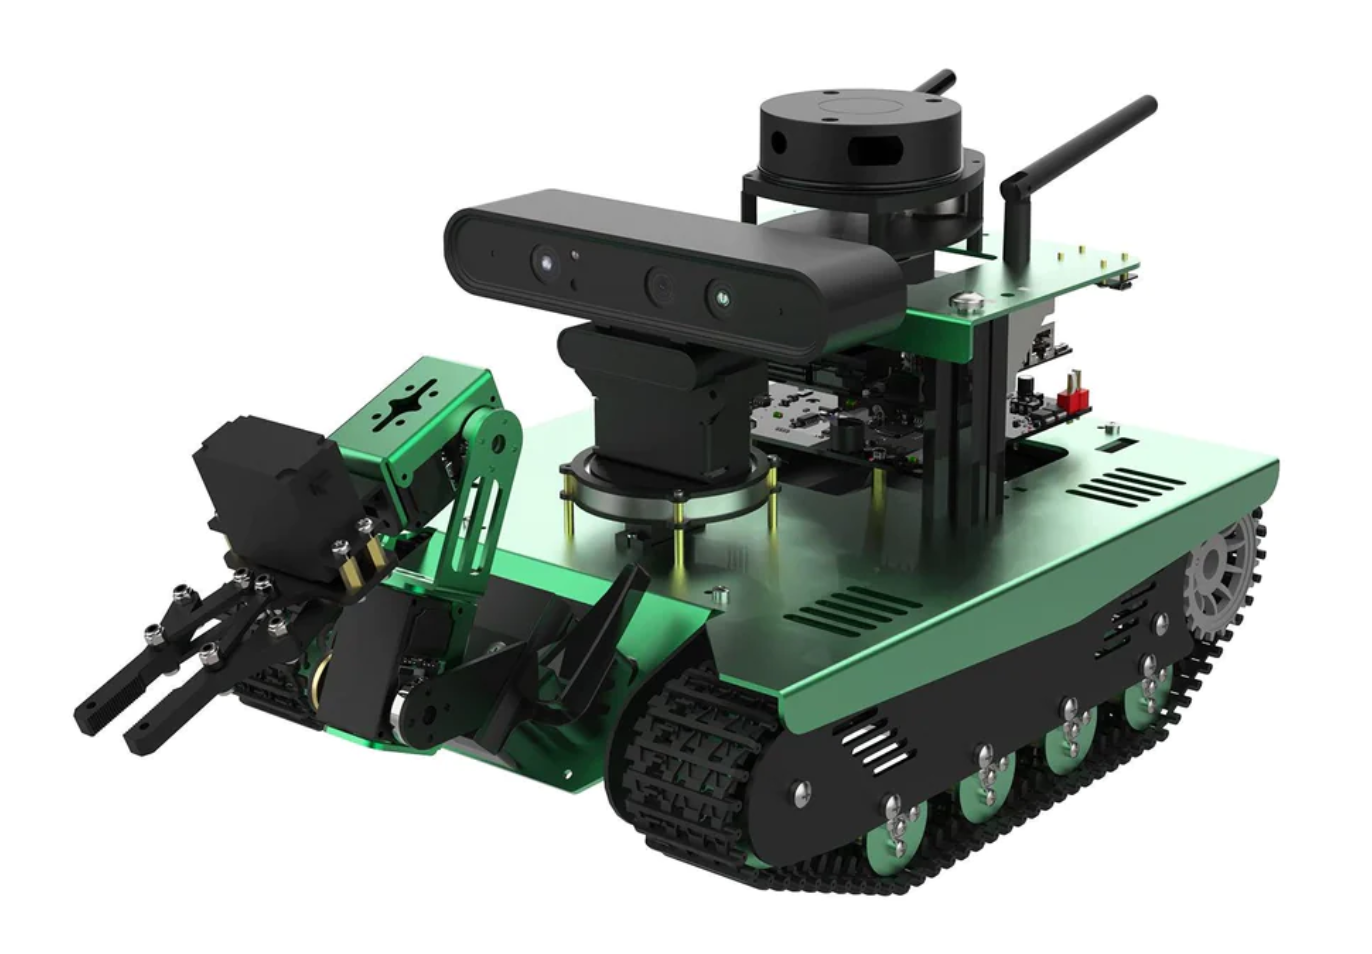
- First, we'll show and explain how easy it is to integrate Viam with a ROS 1 enabled robot from Yahboom and how to control it.
- Second, we'll show how you can collect data and make it available for analysis and training ML models within Viam’s cloud backend.
- Last but not least, we'll share how you can train an object detection model and deploy it to the robot to make use of it.
Let's get started.
Integrate a ROS enabled robot with Viam
A quick intro to Viam
Viam consists of two primary parts: the Viam server, also called the RDK, and the Viam cloud platform.
Viam server is deployed on the robot and simplifies developing software across many different hardware components and services through a unified API layer.
Those APIs are exposed via gRPC/webRTC and thus allow direct connectivity to the robot through a wide variety of client SDKs such as TypeScript, Python, Flutter, and more.
The RDK also integrates seamlessly with the Viam cloud backend for configuration and fleet management, data management including collection and analytics, ML model training and deployment, as well as remote control through the web and mobile applications.
Since there are many different ROS powered robots available—such as the Yahboom line of ROS robots, TurtleBot, and so on—we felt it'd be interesting to see how we can:
- Extend the ROS stack with Viam to provide easy access to the robot APIs via modern programming languages
- Easily integrate ROS with the Viam cloud for fleet management and ML purposes
Integrating the ROS stack with Viam
As a first step, we looked into different ways of integrating the ROS stack with the Viam server.
The Viam server abstracts the hardware through what we call components. Along with out-of-the-box models for a variety of popular hardware components such as cameras, boards, arms, etc., the system can also be easily extended with customized components and services.
We can use an existing components interface such as a board or a camera model and implement the interfaces with our custom implementations to create new hardware integrations.
In our scenario, since the components were already wrapped into ROS packages and accessible through ROS nodes, we decided to create not just a single but distinct Viam components which directly interact with each of the component-specific ROS topics and nodes.

This simple one-to-one abstraction of ROS nodes leads to a seamless integration with the Viam APIs, which allow us to directly use a wide variety of out-of-the-box features such as the ability to remotely control the robot through the Viam web application with live camera pictures.
Check out the source code for different ROS component implementations (thanks to Shawn McCarthy, one of our Solutions Engineers, for providing this code!).
Collect ROS sensor data with the Viam cloud
The Viam cloud, in combination with the Viam RDK, provides data management capabilities for streaming and uploading telemetry data, images, or generic files from a connected robot into the cloud. Enabling this functionality is possible with only a few clicks within the Viam web interface or programmatically through APIs.
Once we had the Viam RDK deployed onto the Yahboom robot and the Viam ROS modules were installed and configured, the data management service needed to be added. This is a straightforward process and can be completed through the web interface.
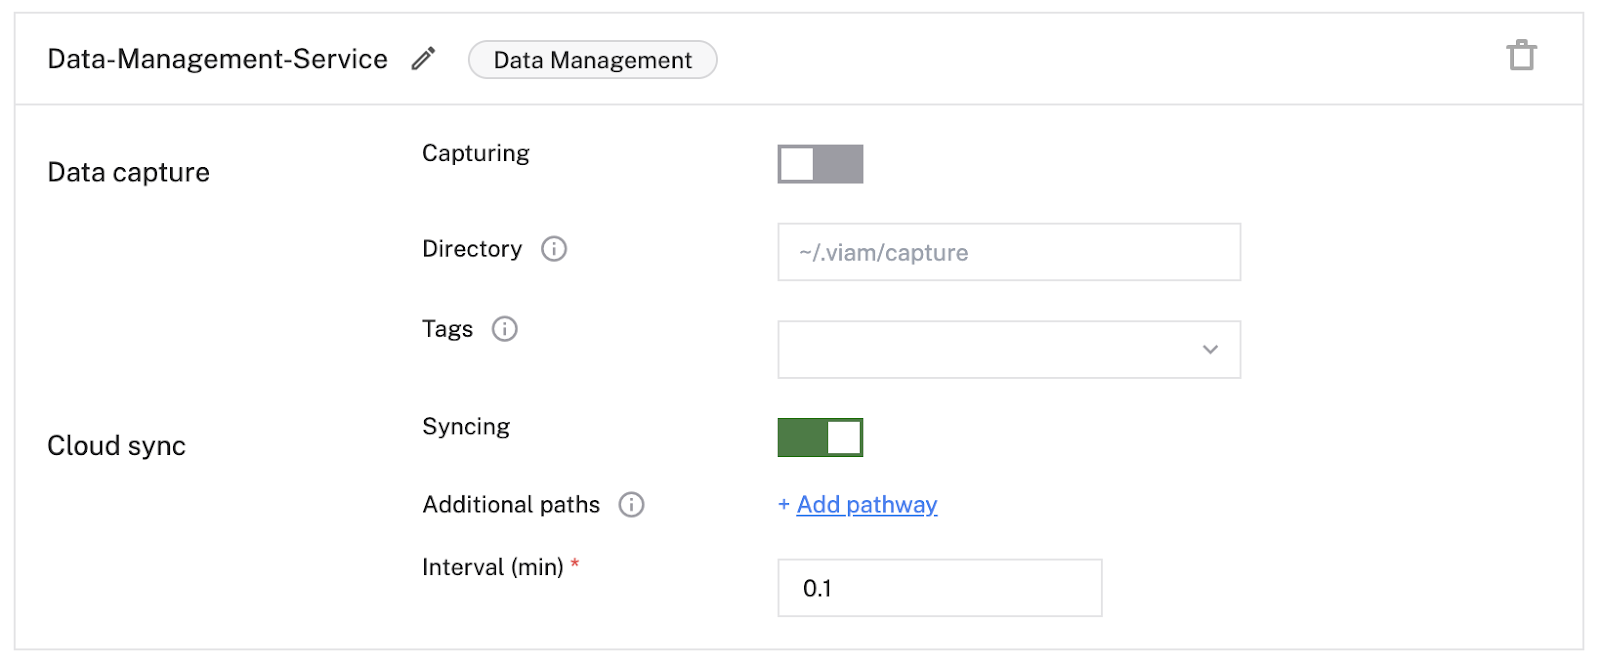
As the data management service provides the ability to collect the data purely on the robot as well as optionally uploading that data to the cloud, the configuration is composed of two parts.
First, we configured the local data collection by specifying the data directory on the robot. All the sensors activated for data collection will store the data in this directory. It is also optionally possible to add tags for easier identification of the data.
As we wanted to bring the data into the cloud, we additionally activated the cloud integration. We didn’t specify any additional paths for data upload and there was no need to adjust the default upload frequency.
Additional directories are a helpful feature if separate data collection mechanisms are to be used. For example, if your robot creates ROS bag files, you can store these in one of these additional directories and the data will become automatically available in the Viam cloud.
Once the data management service was set up, the actual data collection needed to be configured.
Viam allows you to specify the data points to be recorded per component. All we had to do is navigate to a relevant component, choose the type from the data capture configuration, adjust the frequency, and activate the recording on the right as shown below.

As mentioned before, we've tested this approach with the Yahboom Transbot and chose to collect and upload IMU sensor and battery telemetry as well as images from the camera component.
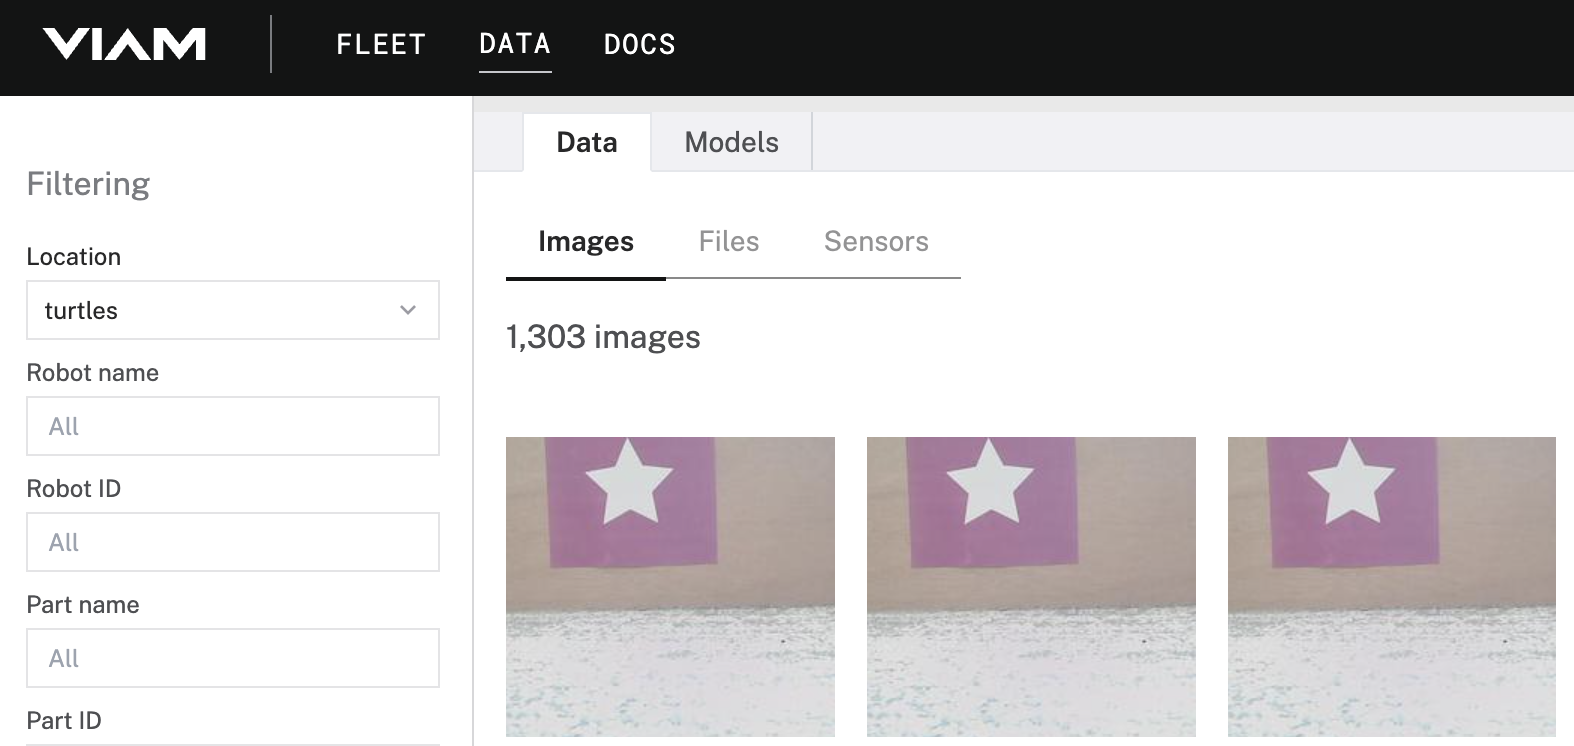
We then went ahead and verified the collected data by navigating to the “DATA” tab in the Viam web application. If preferable, the collected data is also accessible through the Python SDK data APIs (support for more SDKs to follow).
Close the ML data loop with ROS and Viam
So far, we've talked about how we integrated a ROS 1 enabled robot, how we brought data into the Viam cloud platform, and how to access that data.
After successfully completing these steps, we thought about how to use that data to make the robot a bit smarter—which led to training a machine learning model using the collected data, deploying the model to the Yahboom robot, and using the model through the Viam APIs.
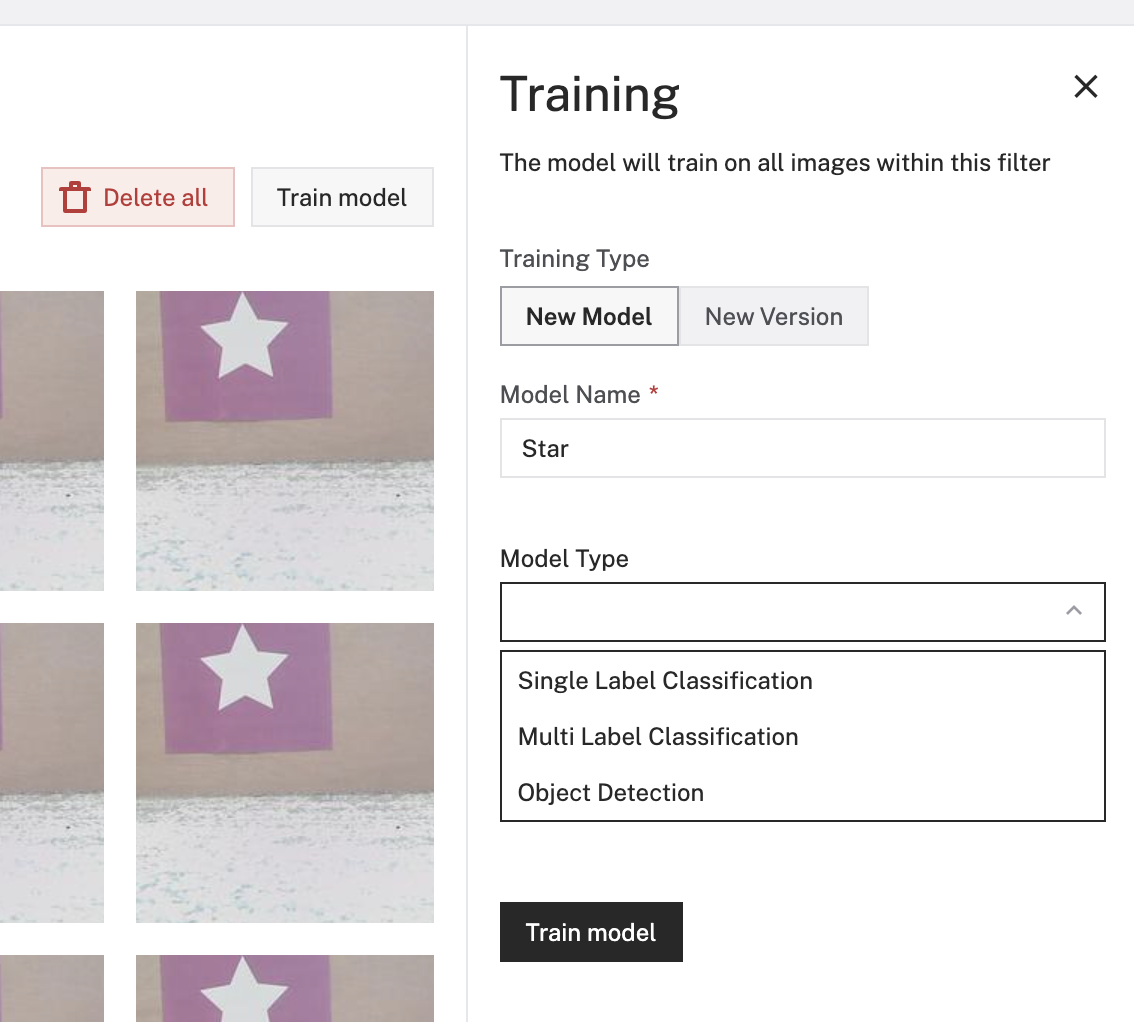
As we have all the data required for training already available in the right place, all we had to do was to start using Viam’s built-in ML model training capabilities. The built-in service currently supports three different model types: Single Label Classification, Multi Label Classification, or Object Detection.
We chose Object Detection as the idea was to identify symbols in our playground environment, which then later on could be used to interact with navigation capabilities of robots.
To enable object detection, you would typically have to draw bounding boxes around each symbol on every recorded image (which might take a bit of time). We were lucky though and organized a pre-trained model which we had available already. We therefore decided upload the pre-trained model to our Viam organization, which is easily possible through the Viam web application.
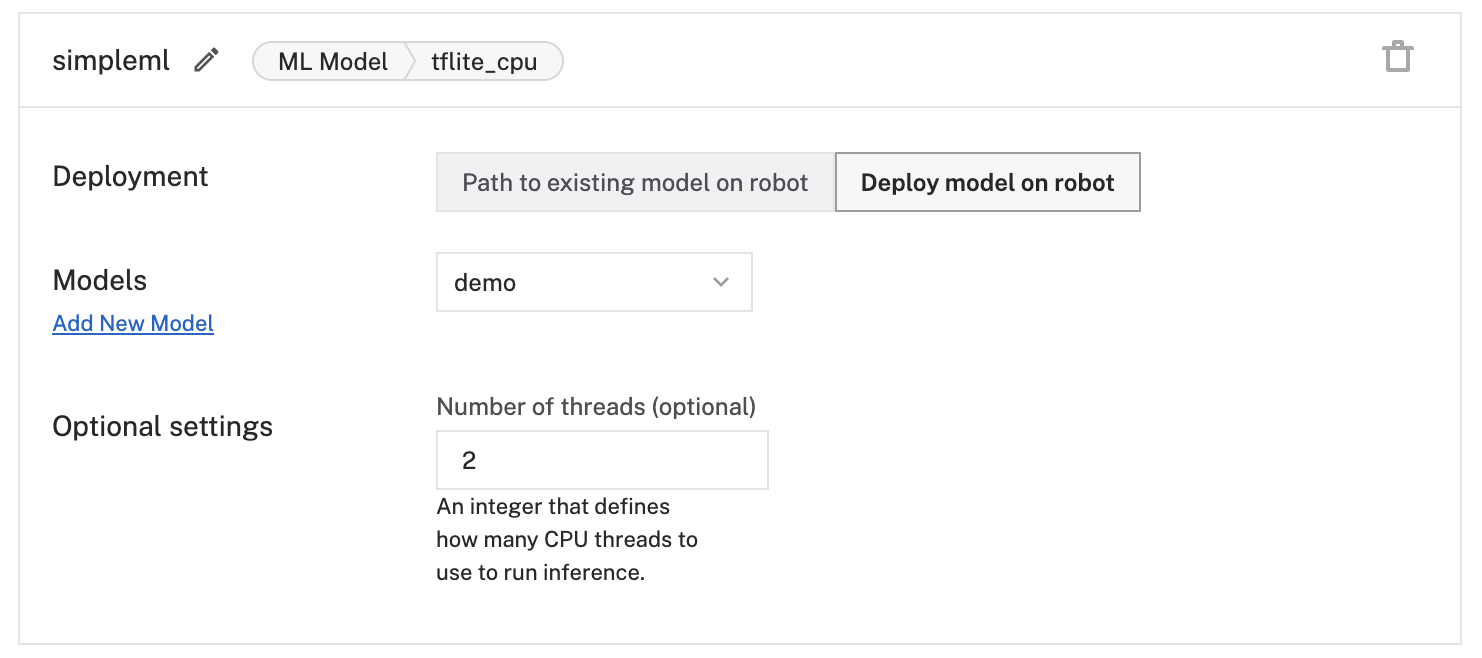
Once the model is available on the platform, it can be deployed to the Viam RDK on the robot with a few simple steps. The first thing we had to do was to create a new service of the type “ML Model.” This component allows us to refer to an existing model on the robot or deploy a new one to the robot. It is also possible to optionally configure how many threads shall be used for running the model.
To get the model working, we then combined it with Viam's Vision Service to run inference on images captured by a camera. All we had to do for this was to create a new service of the type Vision, select “ML Model,” create the service, and then choose the ML model we wanted to use.
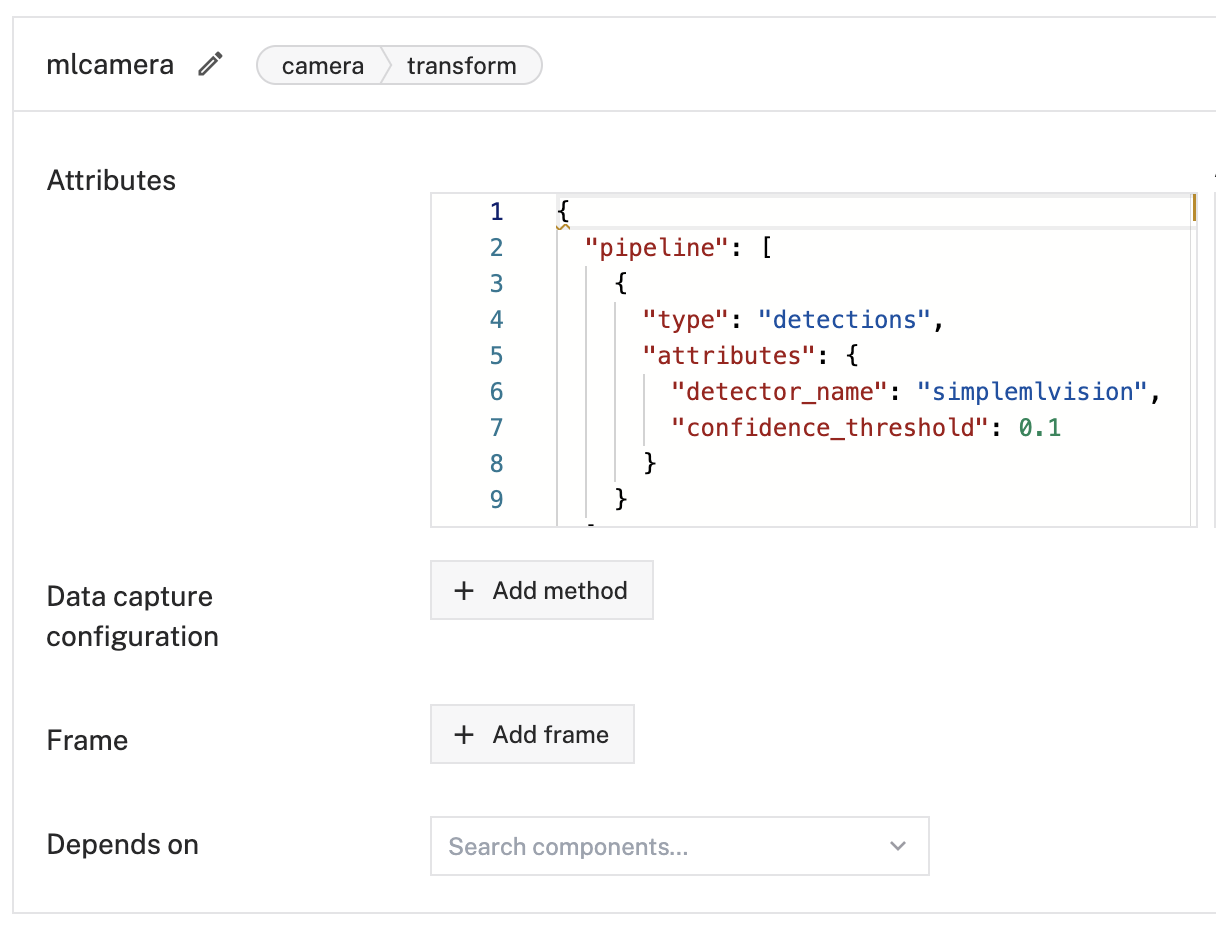
The last step was then to create a new component of the type “Camera” with the transform model. As configuration parameters, we provided the name of the vision service created previously, set a confidence threshold, and saved the configuration.
As the configuration steps were considered complete after this, we finally arrived at the most exciting moment for an engineer—let’s see how it works in action!
We navigated to the control section of our robot in the Viam cloud app, selected the camera transform component, and pointed our robot towards the object we expected to be detected.
Success and off to writing this blog article! 🙂
Try it out: extend ROS with Viam
If want to explore how extending ROS with Viam makes it easier to configure and control robots, we invite you to try it out yourself!
Use this code we've provided for a Viam modular component wrapper for ROS to see how it works. And, create an account for the Viam web app to use the cloud services we covered in this article.
For the mobile app lovers, we also highly recommend taking a look at the brand new Viam mobile app—now available in the Android and Apple app stores.
If you have any questions or issues, reach out to our team in the Viam Community Discord. We're happy to help you as well as discuss different or improved approaches. Have fun building!
Want to learn more about using Viam with ROS to build robots faster and more flexibly? Check out these resources:
- Use the Viam Flutter SDK to build a mobile or cross-platform app for your customers to interface with your ROS robots
- Get data from your ROS robot into the cloud in just 5 minutes using Viam
