
.png)
While writing code to create new functionality and products is exciting, writing boilerplate or repetitive code is annoying. Open software repositories, which make the sharing of libraries easy and convenient, are a powerful way to reduce the amount of annoying code any one developer needs to write. The recent release of the Viam Modular Registry brings similar convenience to the world of smart machines and robots.
The modular registry is powerful for both general code deployment and for leveraging code written by another community or business. I thought I would demonstrate this by centering this blog on the Viam Registry, using our ROS 2 integration as an example.
You can find our ROS 2 Integration in our new Viam solutions engineering repository, and if you would like to contribute, feel free to do so and create a pull request.
Creating and Deploying modules with the Viam Registry is straightforward, and requires the following simple steps:
- Download or develop your own modular resource(s)
- Publish your module to the Viam Registry
- Deploy the module to your robot
Developing modular resources
Our previous blog posts hopefully contain enough information to provide an idea about writing resources and modules. There are also a bunch of good examples in the Python and Go SDK repositories. If you prefer more detailed information, you can also have a look at Viam's official documentation or the SDK docs.
We built a ROS 2 integration and made it available on GitHub. Therefore, my first step was to clone the Viam Sol-Eng ROS 2 Integration repo onto my computer.
Publishing Modules to the Viam Registry
Let’s start with turning a local module or modular resource into a versioned package available through the Viam registry. The process is simple, and starts with creating a namespace for your organization, as documented here.
At the moment, interactions with the Viam Registry are primarily command line driven. In order to create new modules or update existing ones, you have to install the Viam CLI. Once this is done, you then navigate to the root folder of your modular resource and create the required metadata for your module using the Viam CLI:
The command will create a meta.json file, and you will want to update a couple of other configurations, especially around setting your module as private or public. Private means the modules are only available for your organization and robots, whereas public means anyone can install it on their robot as well.
Once you have completed the meta.json file, you have to update the registry with the above information. All you have to do is to execute this simple command:
Should you want to change some of the settings at a later point in time, all you have to do is to change the settings in meta.json and run the update command again.
The next step is to create a tarball to be uploaded later:
Now you are ready for the versioning, and can upload as follows:
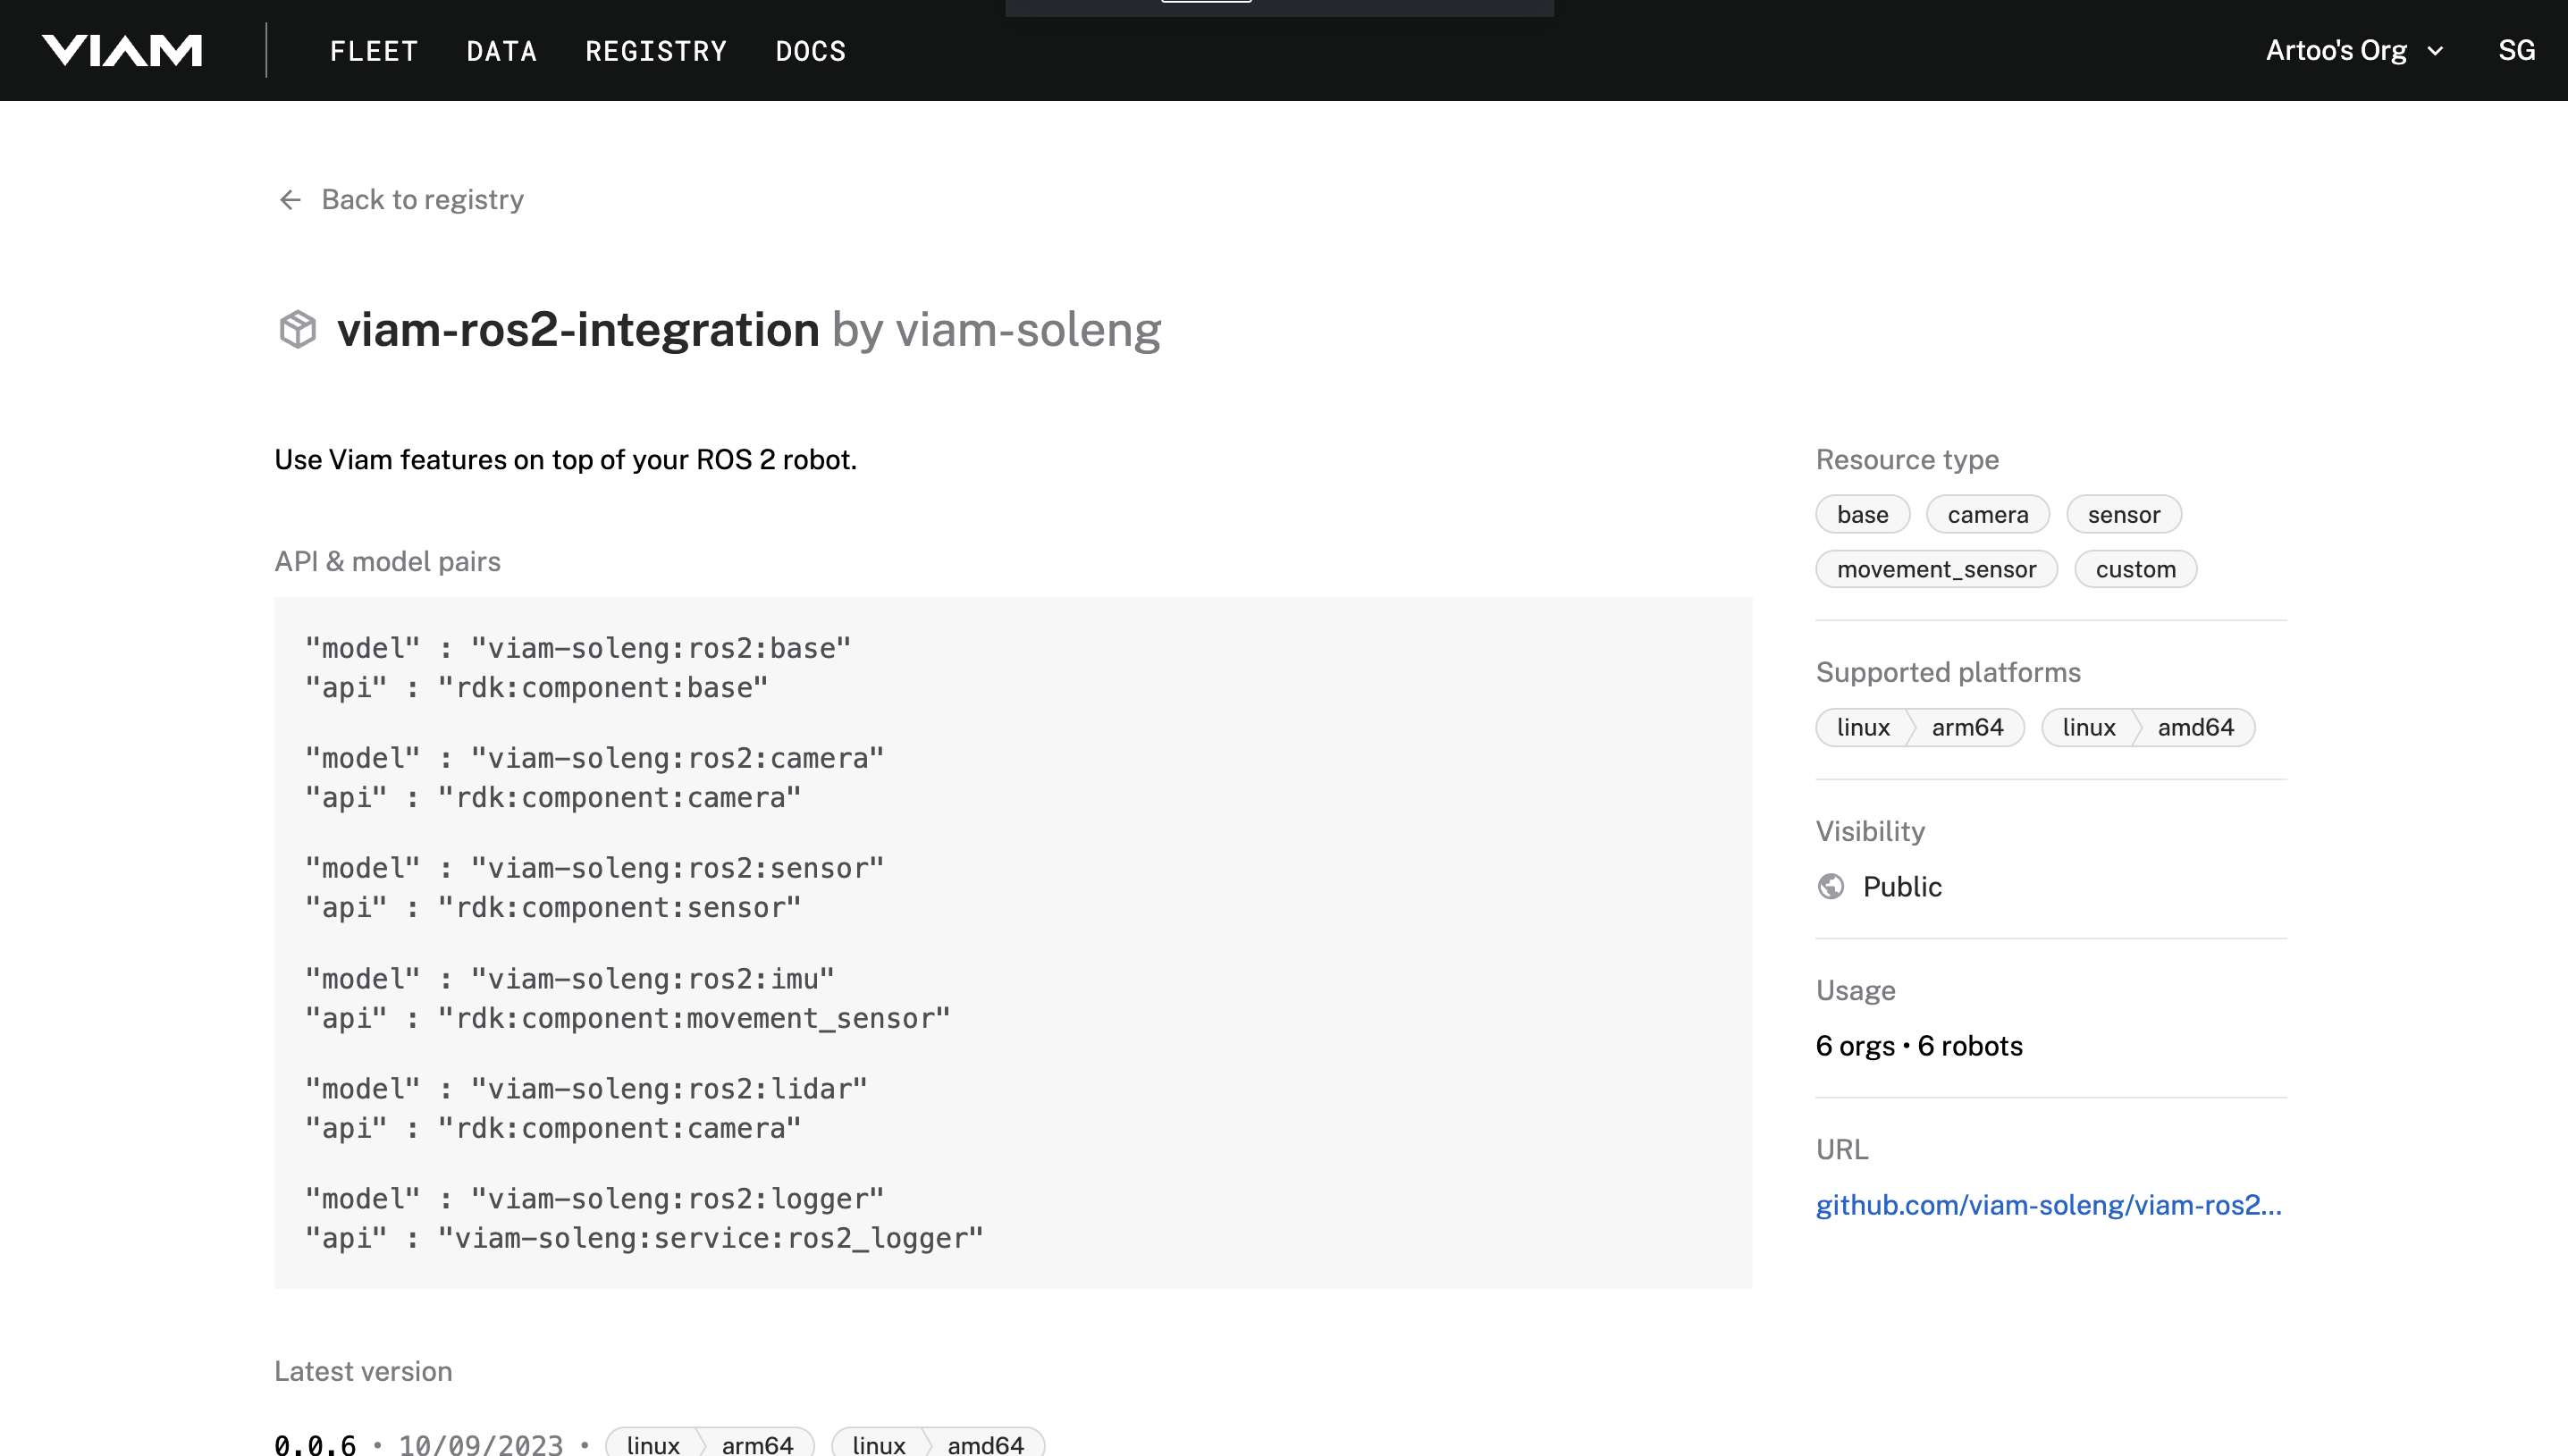
And voilà, we can now find our ROS 2 Integration in the Viam Registry:
Deploying code using the ROS 2 module as an example
Onward to the exciting part!
My Turtlebot 4 was already set up with the Viam server and connected to the Viam cloud platform. So all I had to do next was to login to the Viam cloud and navigate to the configuration section of my robot, hit the Create component button, and type the component or service which I would like to add. As you can see in the screenshot below, the Viam Registry gets automatically searched and provides you with all the different options available.

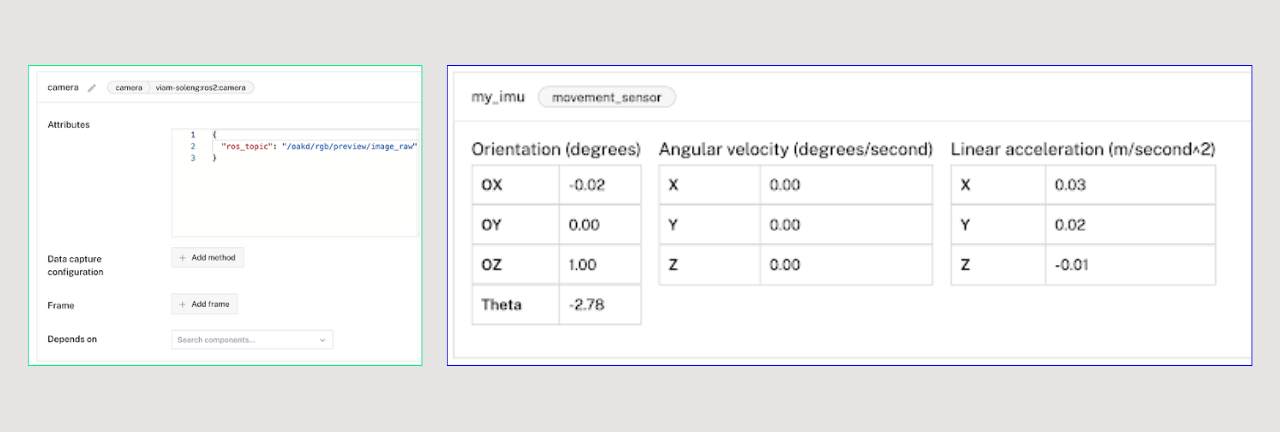
The last step is to configure the added ROS 2 component, which is the camera in my example here. Most components and services only need to have the ROS topic defined as shown in the following screenshot. The module automatically reconfigures the component, and when you navigate to the control tab, you should directly have access to it.
The component I enjoy interacting with the most is the base. It gives you direct remote control just by adding two configuration parameters, as shown below:
.png)
Curious? Go and try it out for yourself, and if you get stuck, don’t hesitate to ask about it on our Discord channel. You are also very welcome to contribute!
Have fun!
