

Have you ever wanted to detect how close an object is to your robot or device? With Viam and an HC-SR04 ultrasonic sensor, you can have live distance readings streaming to your browser in just four steps: wiring the sensor, adding the module from the Viam Registry, configuring it, and gathering live data.
What you'll build
A working ultrasonic distance sensor connected to a Raspberry Pi, streaming live distance readings through the Viam app. Once you have this foundation, you can extend it into a full visual proximity alert that changes an RGB LED from green to red as objects approach — see ‘What’s Next?’ section at the end.
What you'll need
Hardware
- Raspberry Pi 4 (recommend at least 4 GB RAM)
- microSD card
- Power supply (5V 3A USB-C for the Pi)
- HC-SR04 ultrasonic sensor
- Solderless breadboard
- Resistors: 1× 1kΩ and 1× 2kΩ (for the voltage divider on the Echo pin)
- Jumper wires (female-to-male)
Software
- A free Viam account — sign up at app.viam.com
- Raspberry Pi Imager (to flash your Pi)
Before you begin: Set up your Raspberry Pi
If your Pi is already running and connected to Viam, skip ahead to Step 1. If you're starting from scratch, follow the Viam setup guide to flash your Pi, install viam-server, and get your machine showing as Live in the app.
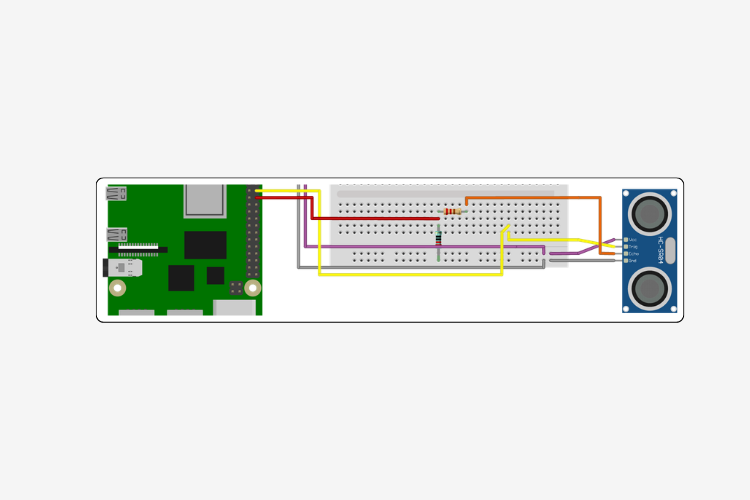
Step 1: Wire it up
The HC-SR04 operates at 5V logic, but the Raspberry Pi's GPIO pins are 3.3V tolerant. The Trig pin (output from the Pi) is fine at 3.3V. The Echo pin (output from the sensor back to the Pi) carries 5V, so a simple resistor voltage divider is needed to bring it down to a safe level.
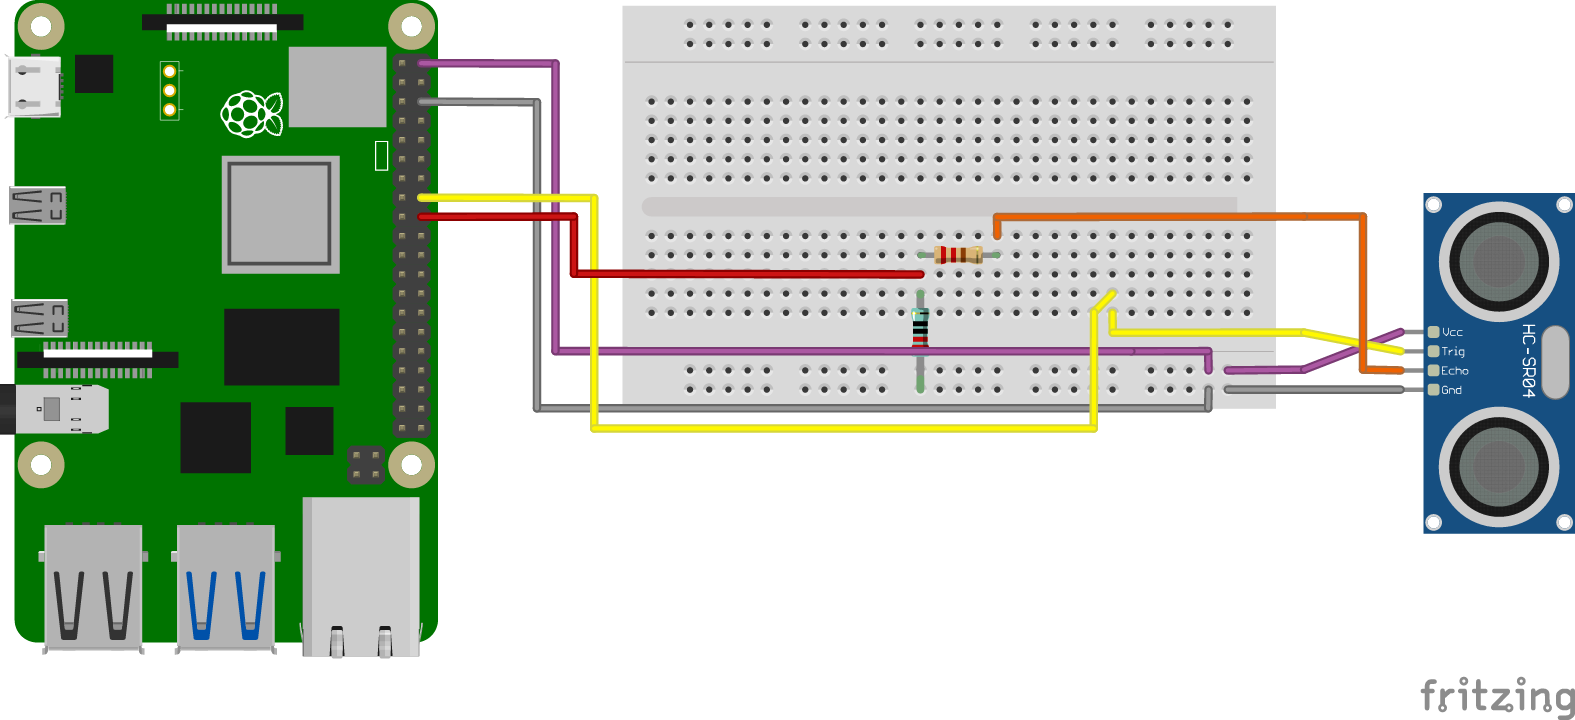
- VCC → Pi 5V (Physical Pin 2)
- Trig → Pi GPIO 23 (Physical Pin 16)
- Echo → 1kΩ resistor → Pi GPIO 24 (Physical Pin 18); 2kΩ resistor from that junction to GND
- GND → Pi GND (Physical Pin 6)
Physical pin numbers refer to the location of the pin on the Raspberry Pi and are different from their GPIO pin numbers. Both are given to be more explicit. To find the physical pin numbers, first orient the pi to have ports facing downward (like in the diagram). Starting at the top-most, left pin is physical pin 1, top-most, right pin is physical 2, and so on…
Use the breadboard to build the voltage divider and route the jumper wires from the sensor pins to the corresponding GPIO pins on the Pi.
Step 2: Add your components
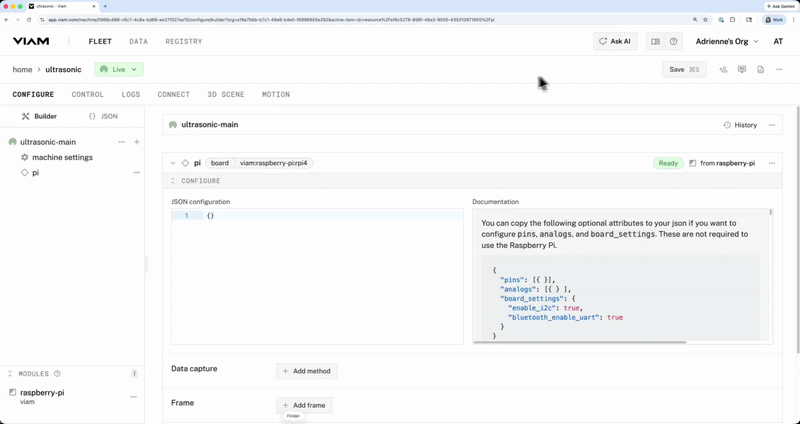
With your hardware wired and your Pi connected to the Viam app, navigate to your machine's CONFIGURE tab.
Add the board component
The board component gives Viam access to the Raspberry Pi's GPIO pins — the ultrasonic sensor needs this to function.
- Click the + icon and select Configuration block.
- In the Registry search bar, type raspberry-pi. You’ll see several results. Select the raspberry-pi:rpi4 or raspberry-pi:rpi5 module depending on your board. Click Add component.
- Give your component a name (e.g., pi) and click Add component..
- Click Save.
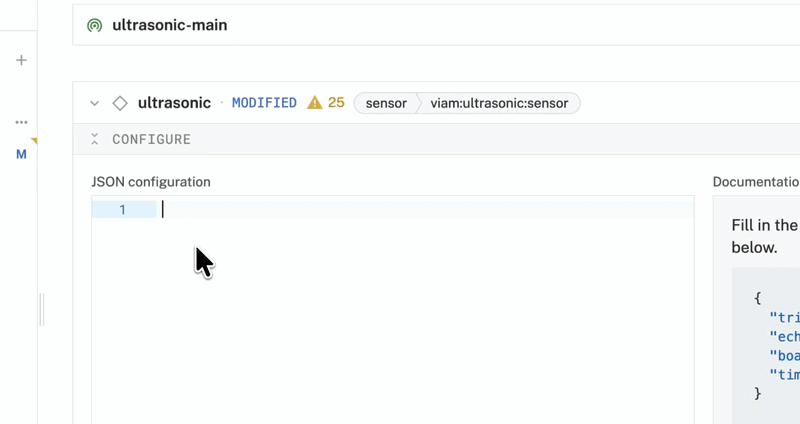
Add the ultrasonic sensor component
- Click the + button to add a new component, then select Configuration block.
- Type in ultrasonic. Select ultrasonic/sensor (the one listed as type SENSOR, authored by viam). Click Add component.
- Give your component a name (e.g., ultrasonic) and click Add component. The supporting module will be installed automatically.
- Click Save.
Step 3: Configure the module
After adding the component, you'll land on its configuration panel. In the JSON configuration section, fill in the attributes for your sensor:
{
  "trigger_pin": "16",
  "echo_interrupt_pin": "18",
  "board": "<your-board-name>",
  "timeout_ms": 1000
}- trigger_pin — the GPIO pin number connected to the sensor's Trig pin (16 in this example).
- echo_interrupt_pin — the GPIO pin number connected to the Echo pin output of your voltage divider (18 in this example).
- board — the name of your board component in Viam (e.g., board-1).
- timeout_ms — how long to wait for an echo response before timing out. 1000ms is a safe default.
Once you've filled in the fields, be sure to click Save (or press ⌘S / Ctrl+S). The app will show "Unsaved changes" in the header until you do. Once saved, the component status should switch from MODIFIED to Ready.
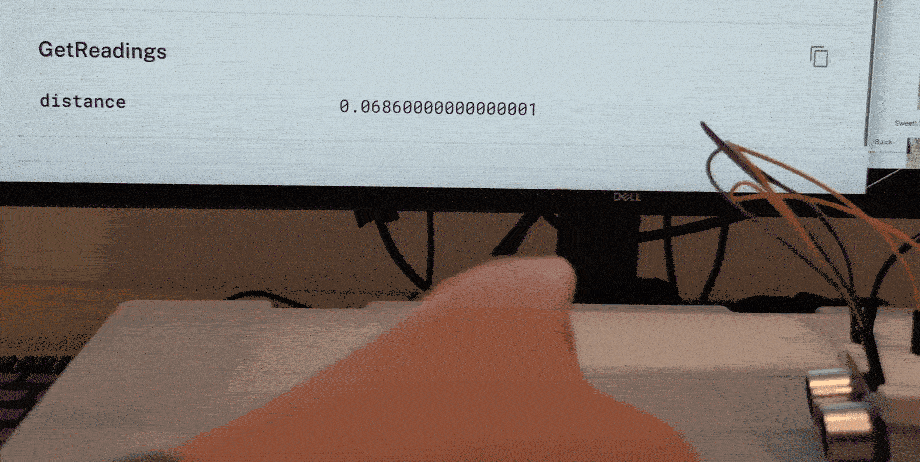
Step 4: Get live data
Navigate to the CONTROL tab and find your ultrasonic sensor component. Click TEST to expand the testing panel.
Set the dropdown to Refresh every second to start streaming data. You'll see a distance field updating in real time (in meters) as you move your hand or an object toward and away from the sensor. That's it, now you have live ultrasonic distance data!
What's next?
Now that you have a live distance sensor, you can take it further:
- Add an RGB LED and write a simple Viam module to change its color based on distance thresholds — turning green when an object is far away and red when it gets too close. That's exactly what the full Visual Proximity Alert codelab walks you through.
- Capture data using Viam's built-in data management to log distance readings over time.
- Use Viam Triggers to send a notification or fire an action when an object enters a defined range.
Start building at app.viam.com.
