

.png)
What you'll build
You'll wire a micro servo to a Raspberry Pi, configure it as a servo/gpio component in Viam, and use the built-in TEST panel to move it to any angle you want.
What you'll need
Hardware
- Raspberry Pi 4 (or Pi 5)
- Micro servo (e.g. SG90 or similar 3-wire hobby servo)
- Male-to-female jumper wires (3)
Software / Accounts
- Viam account
- viam-server installed and running on your Pi
If your machine isn't set up yet, follow the Viam setup guide to get viam-server installed and your machine showing as Live in the app.
Step 1: Wire it up
Your servo has three wires. Connect them to the Raspberry Pi GPIO header using jumper wires:
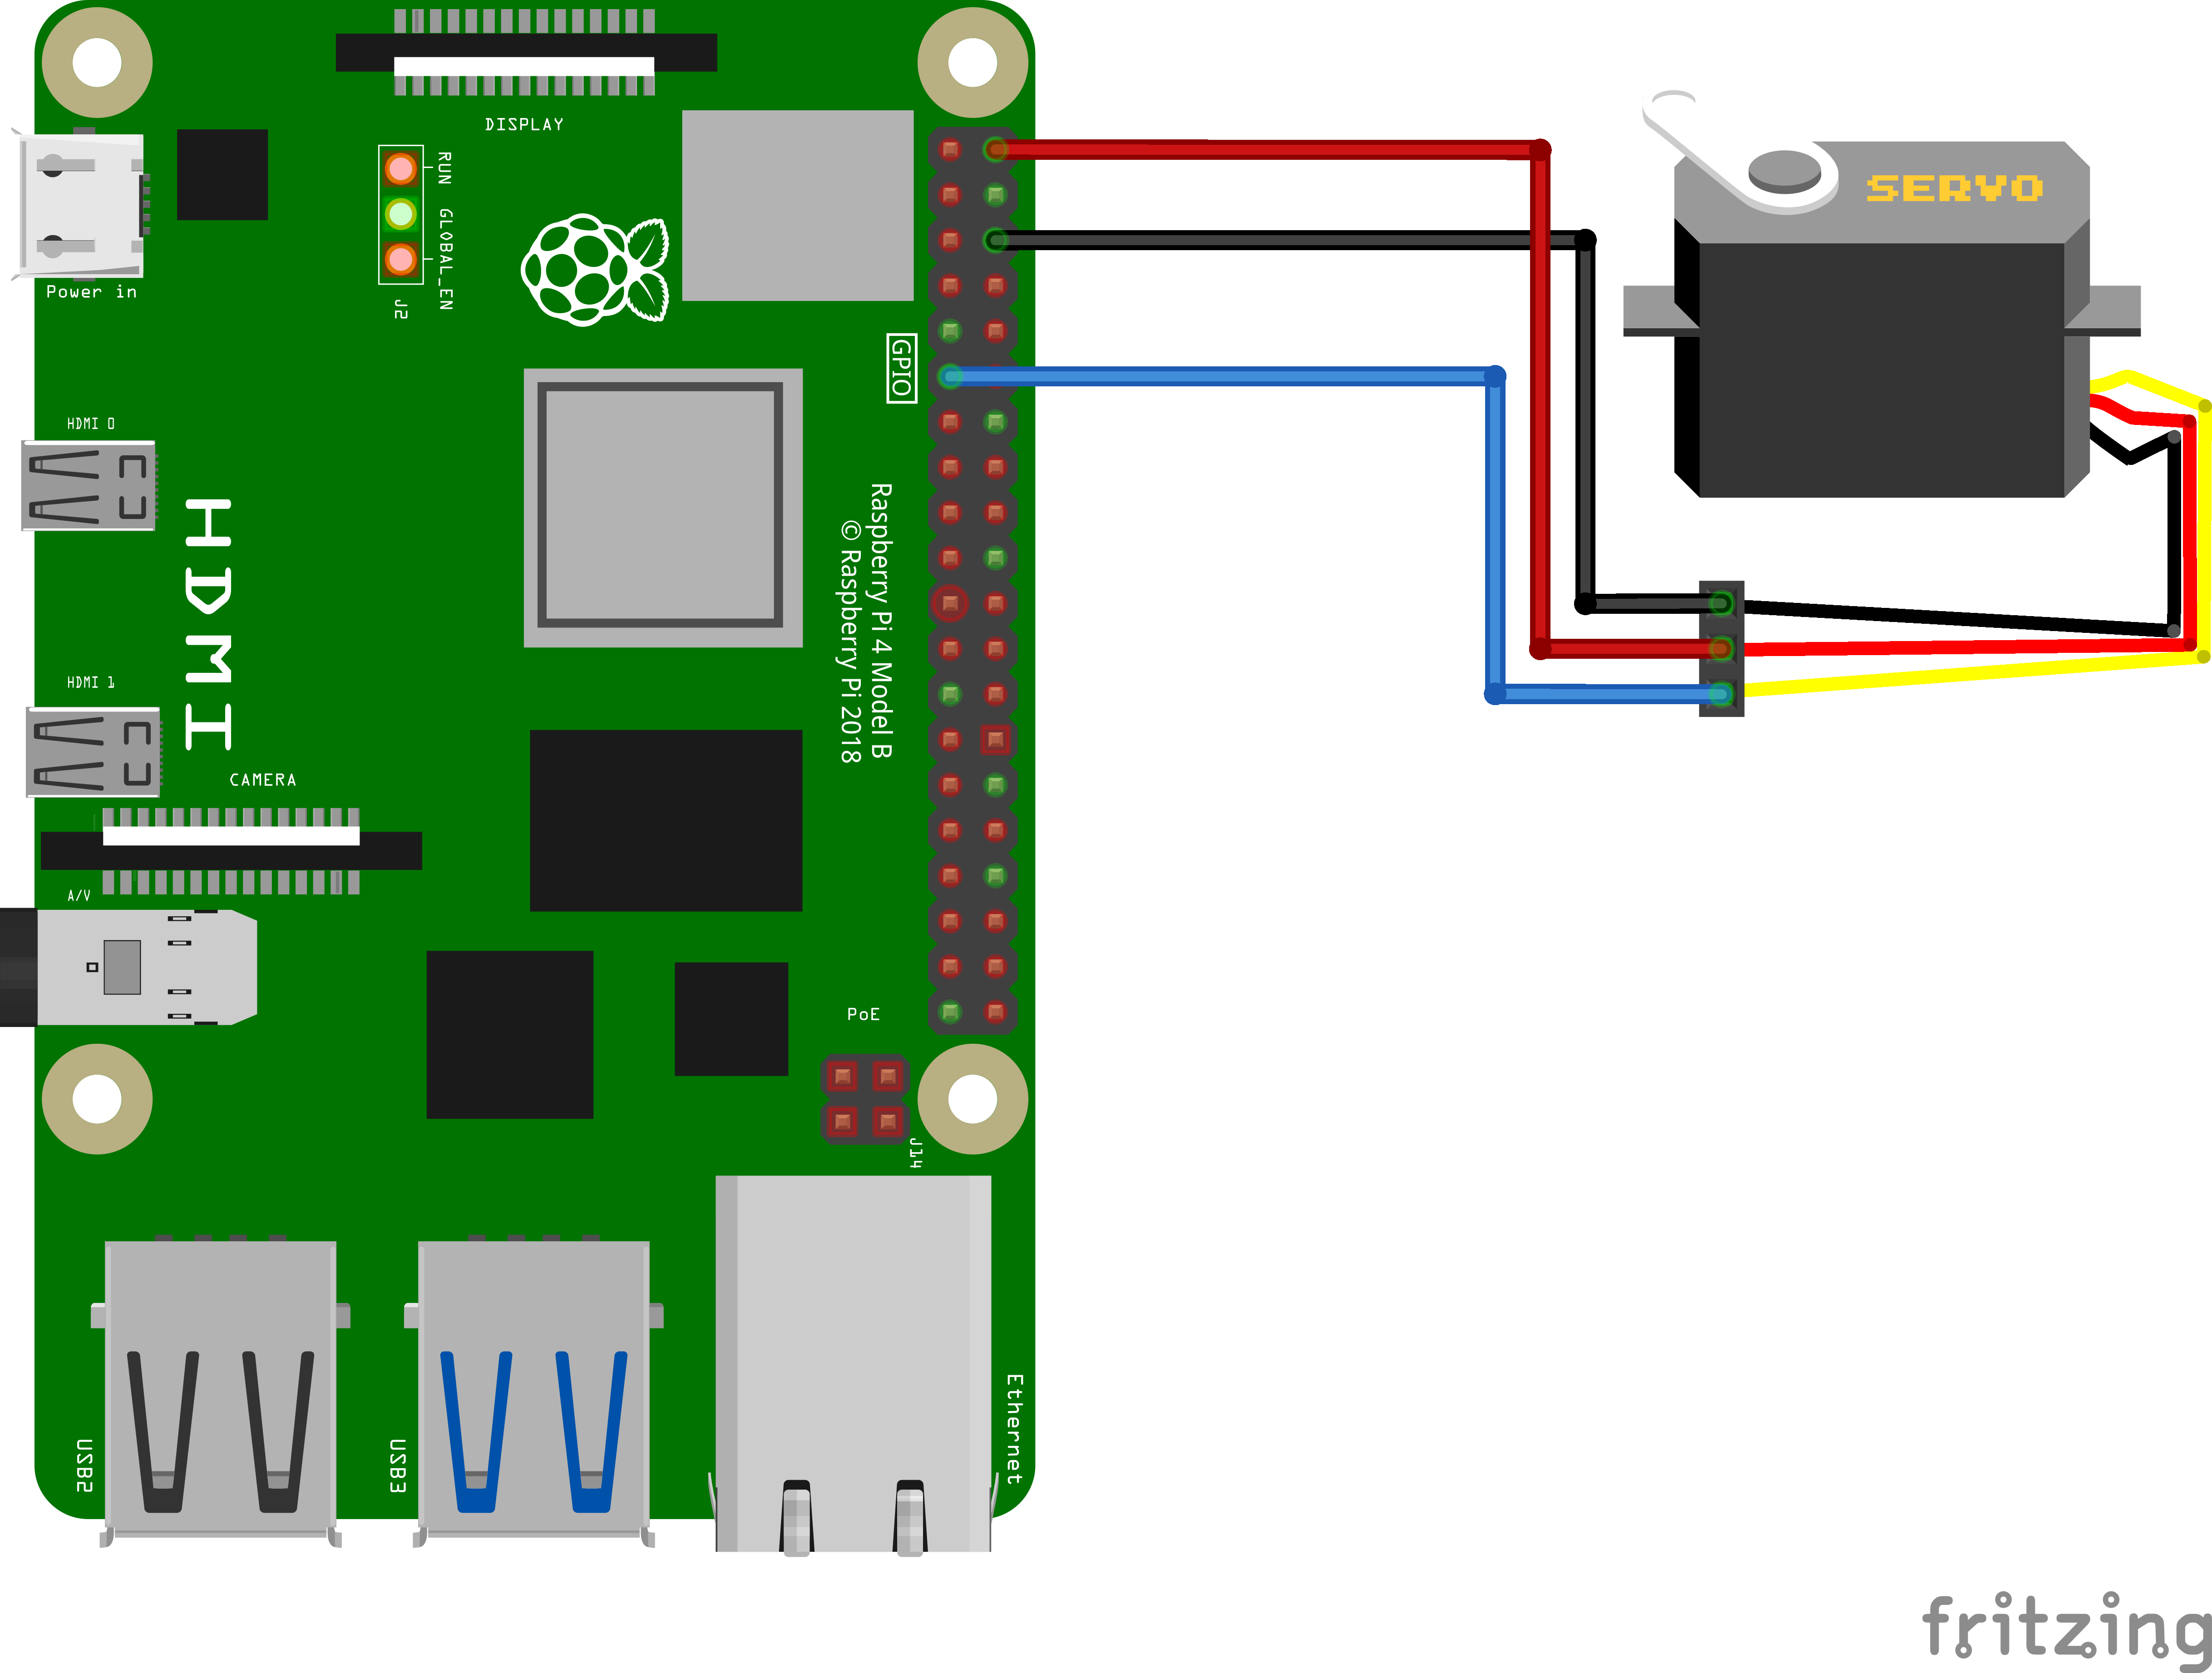
- Red (Power) → 5V (Physical pin 2 or 4)
- Brown/Black (Ground) → GND (Physical pin 6, 9, or 14)
- Orange/Yellow (Signal) → GPIO 17 (Physical pin 11)
Tip: You can use any GPIO pin for the signal wire. Our example uses GPIO 17. Just note the physical pin number (11), not the GPIO number (17). You'll need it in the next step.
Step 2: Add your components
Add the board component
Before adding the servo, make sure your Raspberry Pi is configured as a board component. In your machine's CONFIGURE tab:
- Click + and select Configuration block
- Search for raspberry-pi and select raspberry-pi:rpi4 (or rpi5 if you're on a Pi 5)
- Give it a name, e.g. pi
- Click Add component
Add the servo component
- Click + and select Configuration block
- Search for servo and select servo/gpio
- Name the component, e.g. gpio-servo
- Click Add component
- In the JSON configuration panel, add the physical pin number (not GPIO) and the name of the board component:
{
  "pin": "11",
  "board": "pi"
}
Important: Use the physical pin number (11), not the GPIO number (17). The video calls this out explicitly — they're different numbering schemes.
Click Save. Don't forget to save!
Step 3: Move Your Servo
- Open the TEST section of your gpio-servo component
- GetPosition shows the current angle, updating automatically
- Use Quick move (-5° / +5°) to nudge the servo in 5-degree increments
- Or type any angle directly into the Desired angle field and click Execute
The servo arm will physically rotate to match the angle you set (up to its max range). And just like that, you're controlling a servo!
What's Next?
- Fine-tune behavior — Set min_angle_deg, max_angle_deg, and frequency_hz in your servo/gpio config to match your servo's datasheet
- Control with code — Use the Viam Python SDK or Go SDK to move the servo programmatically
- Add data capture — Log servo positions over time with Viam data management
- Trigger on events — Use Event Manager to move the servo in response to sensor readings
Start building at app.viam.com.
